This normally is one of the first mechanical jobs you tackle on a Caterham build and it is part of the first step in the new manual (v1.2 and v2.0), but it’s actually quite tricky due to the tolerances involved.
If you read other blogs or forums, you will see terms like “2-2-2” and “0-4-0” used during this build step. This refers to the position of the large plain chamfered washers. The washer position is used to alter the caster angle of the front suspension. The first number refers to the number of washers between the front wishbone mounting point and the chassis, the middle number is the number of washers between the chassis rail and the rear wishbone mounting point, and the last number is the number of washers behind the rear wishbone mounting point.
There are five possible combinations listed from most caster to the least caster.
- 4-0-4 More steering effort, more self centring / straight line stability
- 3-1-3
- 2-2-2
- 1-3-1
- 0-4-0 Less steering effort, less self centring / straight line stability
The factory (and the new build manual v1.2 and v2.0) have standardised on 2-2-2; however, the old manual (2015c) still refers to 0-4-0 for wide track suspension (standard on R spec cars). I have only ever fitted 0-4-0, but for this build I decided to install the new-spec 2-2-2. I actually found it more difficult to install 2-2-2.
Start off by checking you have the correct wishbone for the side you are working on, they are handed. The obvious way to tell them apart is to check the label, but if you’ve unpacked them already, just check the bearing: the retaining clip goes downwards.

Note LH for Left Hand Side 
Facing up 
Retaining clip facing down
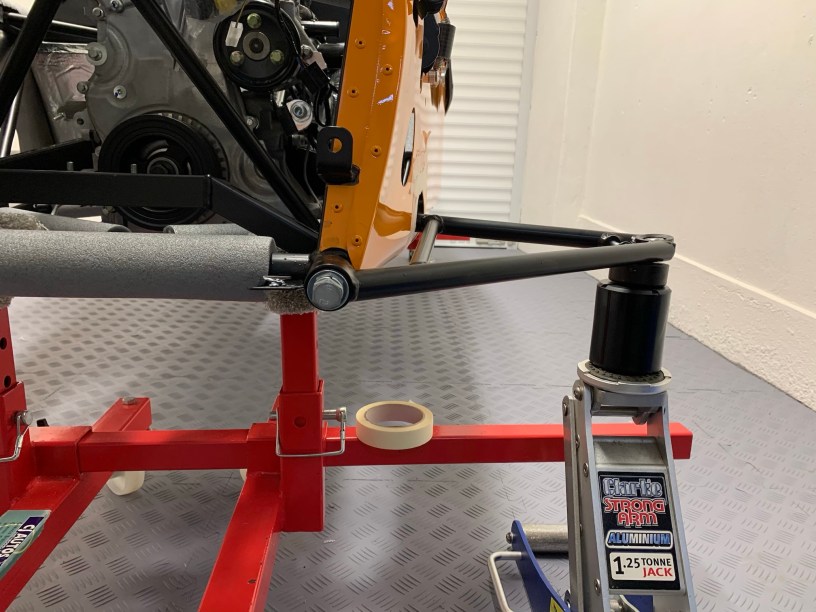
Support the wishbone with the jack (it will touch the skin if it’s not supported) and work from the back to the front. Check that the bolt passes through into the chassis before applying copper grease.
Wishbone supported 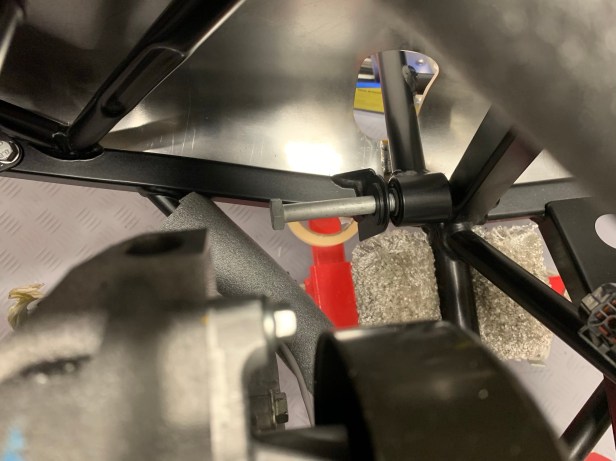
Check bolts fit
Fitting the first two rear washers is simple – just remember: all washers have one chamfered side which should point towards the wishbone.
Fitting the next two rear washers between wishbone and chassis tube is a bit trickier: fit the first washer between the wishbone and the chassis tube and hold it in place with a small pin punch. To fit the second washer, I found that creating a little extra pressure with the front mounting bolt made it easier to fit the last washer in at the rear, as it increases the gap at the back and gives you that crucial extra bit of clearance. Be careful not to over-do this or to put too much pressure on the wishbone, because it could bend or damage.
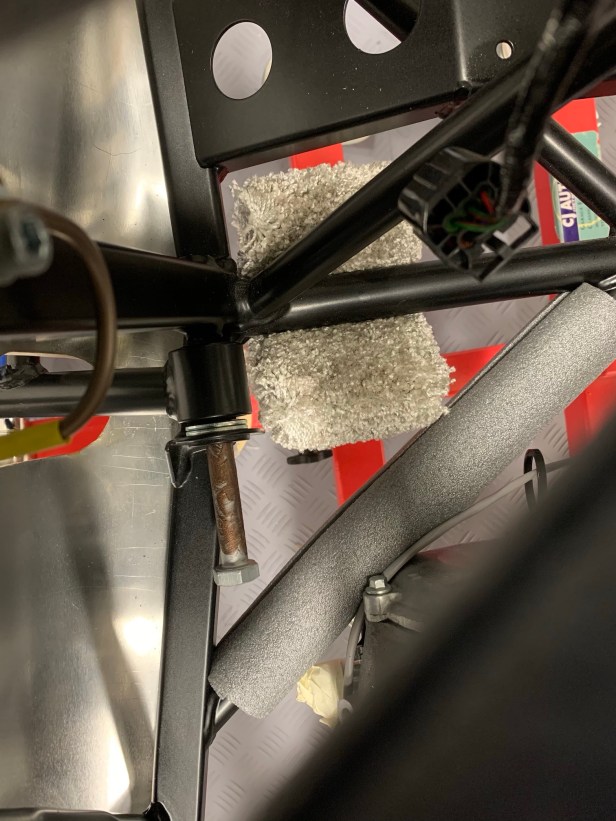
Squeeze the final rear washer between the wishbone and the other washer (not the chassis). You can apply a bit of copper grease to help this final difficult washer get into place.

As far as possible by hand 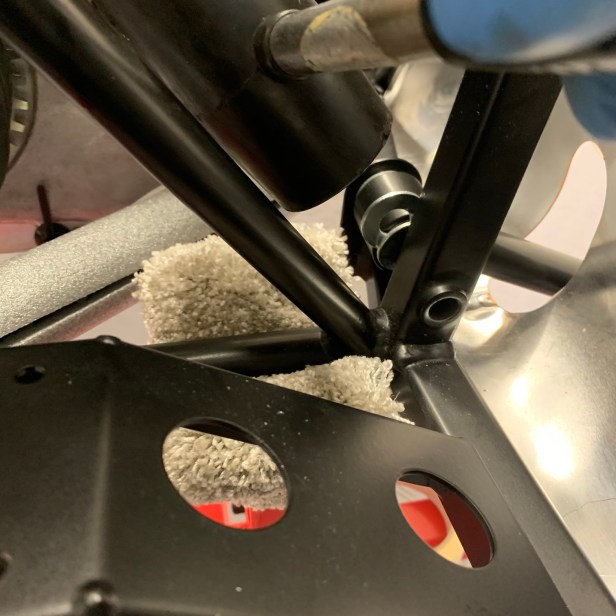
Little persuading 
Time to align with the pin punch
You will only be able to get it so far; then you’re going to need to persuade it, and a rubber mallet is perfect for this (e.g. the type you can buy from a camping shop). Once you have the washer close, you can use a pin punch (small) to align it properly.
The bolt for the lower wishbone may also need a little persuading or twisting into position.

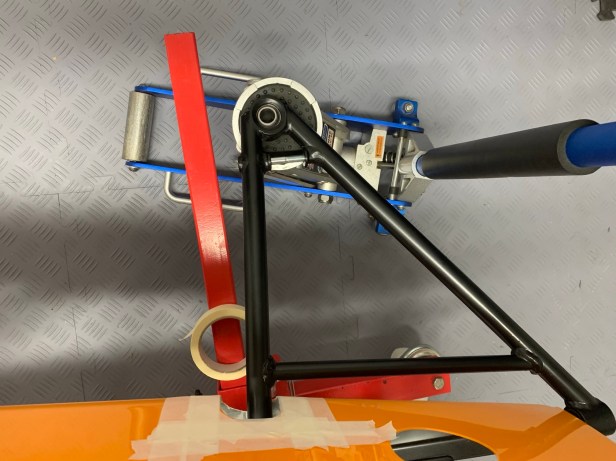
The front wishbone mounting needs two washers behind it. Again, the first is simple and can be held in place with a pin punch, but the second washer is going to be more difficult. I decided to use the webbing of a ratchet strap to create a loop around the wishbone. I then pulled the loop to get the space needed to slip that washer in – a little grease helped. Once again, align the washers with pin punches, working from smaller to larger, until the mounting bolt can be fitted.
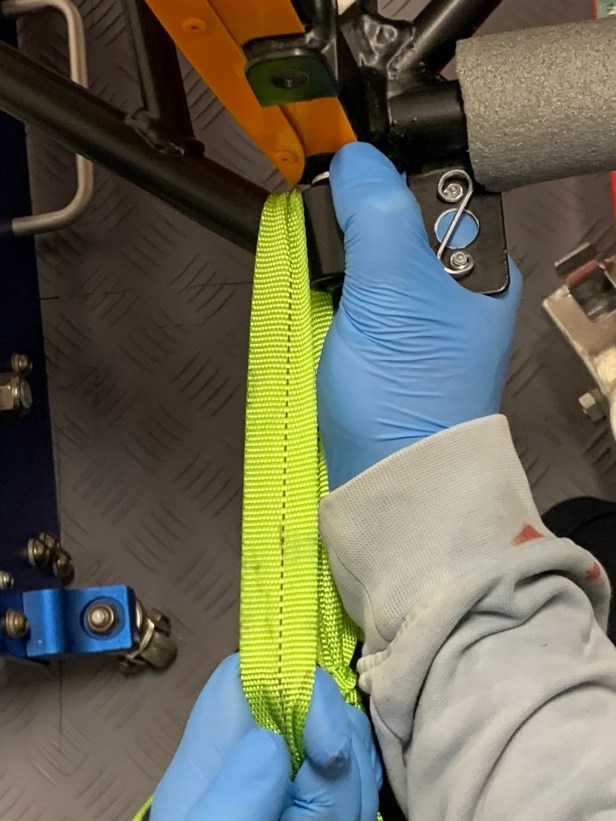
Create the gap for the second washer 
Align with small pin punch 
Medium pin punch 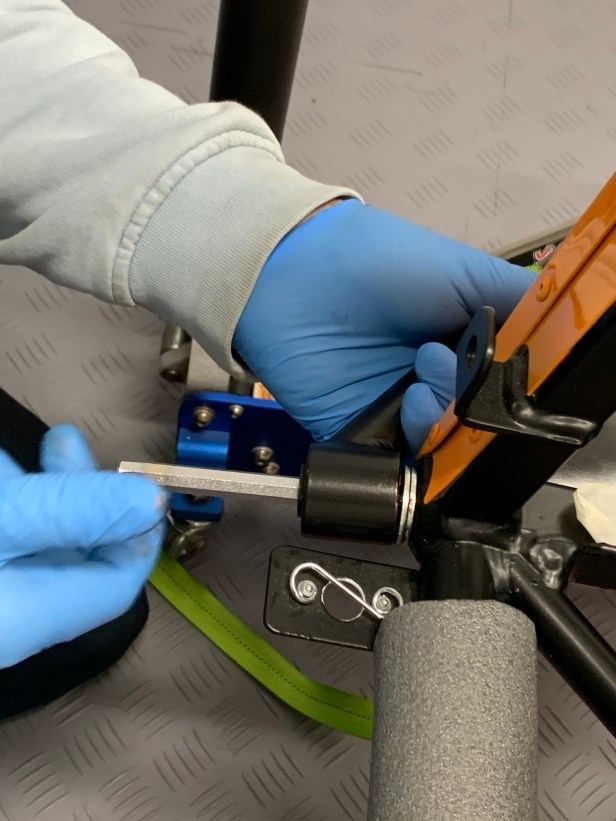
Large pin punch 
Copper Grease 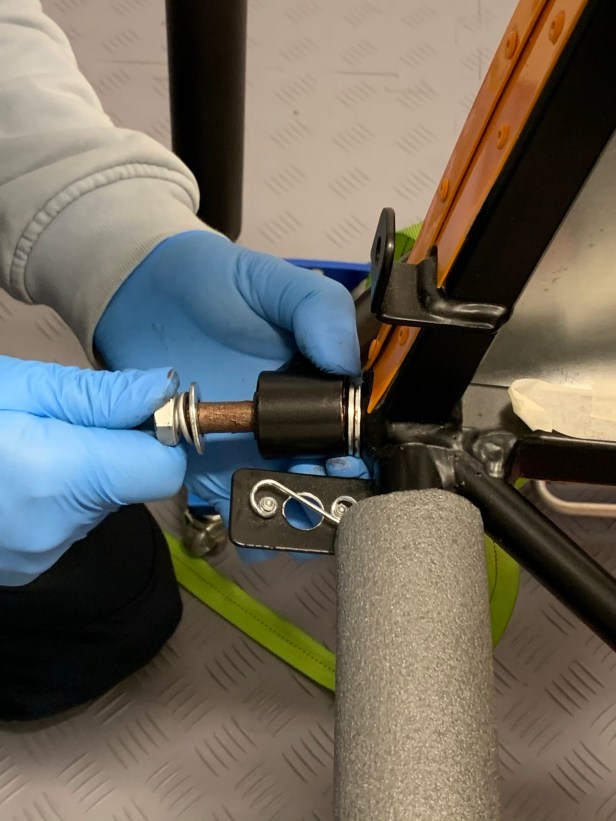
Fit front mounting bolt
The manual (v1.2 and v2.0) says not to torque the bolts (to 81Nm) at this stage, and to wait for the vehicle to be on wheels so that the wishbone bushes sit in their proper location. This may be ok if you have a lift, but you will not have access to the bolts when the dry sump tank and radiator are in place and the car is on its wheels. So, since the wishbone will be level(-ish) when the car is on its wheels, you can simulate this and lift the wishbone with a jack to its level position and torque the bolts.

Nice and level 
All done 
Cleaned with WD40
I will have the car flat-floored post build by a professional company, but more on that when it happens. At this stage I can loosen an re-tourque these bolts to ensure correct mounting location.
Most importantly: don’t torque the wishbones if they are not in the right place.
I found WD40 cleans the copper grease off, for a neat finish.
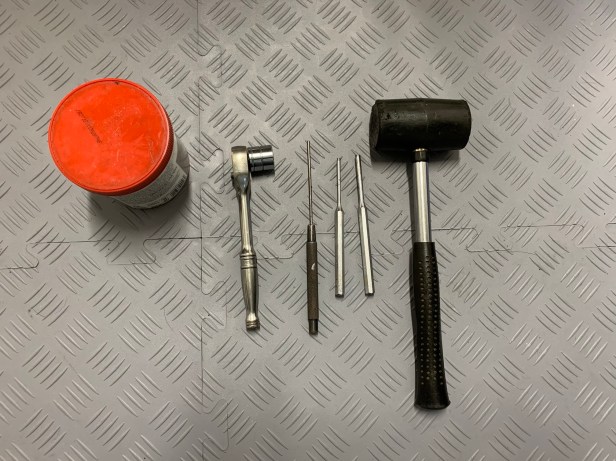
Tools used:
- 19mm 3/8 Socket
- 19mm Combination Spanner
- Selection of pin punches
- Rubber Mallet
- Jack and lifting blocks

Hi Chris…I was going to ask about the order of build, and since you’ve done this one later than the manual suggests, I thought I’d ask. So I am going to be moving house part way through. So for me, the most important thing is to get the wheels on the chassis so that it can be moved/trailered before completion. That’s wheels on possibly before Engine goes in. Any thoughts on that?
J.
LikeLike
That’s no problem. It slightly complicates the engine install because the diff and prop shaft will need to be in place before the rear suspension is fitted.
LikeLike
Chris. Could never have managed this on my own without your tips and excellent photos! Thanks. Just one tip from myself: I found it easier to do the second washer on the front wishbone by using a small flathead screwdriver to wedge the gap open and slide it in.
LikeLike