The upper front wishbone is a lot easier to identify, but as with the lower wishbone you can confirm you have the correct side from the packaging. It’s important that you protect the paint for the upper wishbone fitting because the nut from the front mount will actually touch the painted skin. Sometimes you will need to bend the skin a little for it to clear. For my build I didn’t need to do this. Start the process checking the bolts fit.

Get the right parts 
Check the bolts fit and protect the paintwork
At this point I took the opportunity to check the headlight bracket also fits (the bolt will go through the hole), because it’s also mounted on the front upper wishbone mount: mine didn’t. I have seen many blogs where this happens, so I was expecting this. Checking the fit at this stage of the build means that I can get an item to the powder-coaters if their finish gets damaged, and get them back before I need them for the build.

It seem like you have two options: enlarge the holes, or alter / adjust the hook at the bottom of the bracket which holds onto the chassis. Enlarging the hole will definitely result in damage and the need for refinishing, so I chose to adjust the hook. Using a small pry bar I opened the latch up until the bracket fitted. It’s important to do this with the IVA wiring grommet in the chassis. In doing this, the headlamp bracket finish was undamaged.

Hook to be adjusted 
Paint protected 
Small pry bar (also protected) 
Before adjustment 
After adjustment
On the subject of the IVA wiring grommet, I decided to replace this with a larger diameter grommet than the Caterham supplied unit, because the headlight wiring is such a difficult area of the build, and I decided that every little helps. I got the grommets from a Halfords kit (which I have had for years). The most important this is not to ignore or forget that grommet, because it is a total pain to attempt to fit it later.

Larger grommet 
Halfords kit 
Grommet in place from above 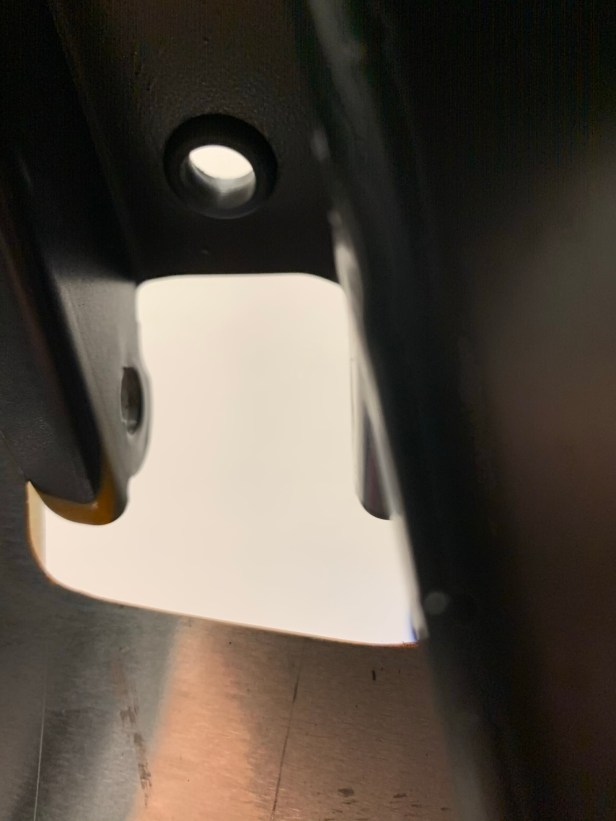
Grommet in place from below 
Headlight bracket and grommet fitted
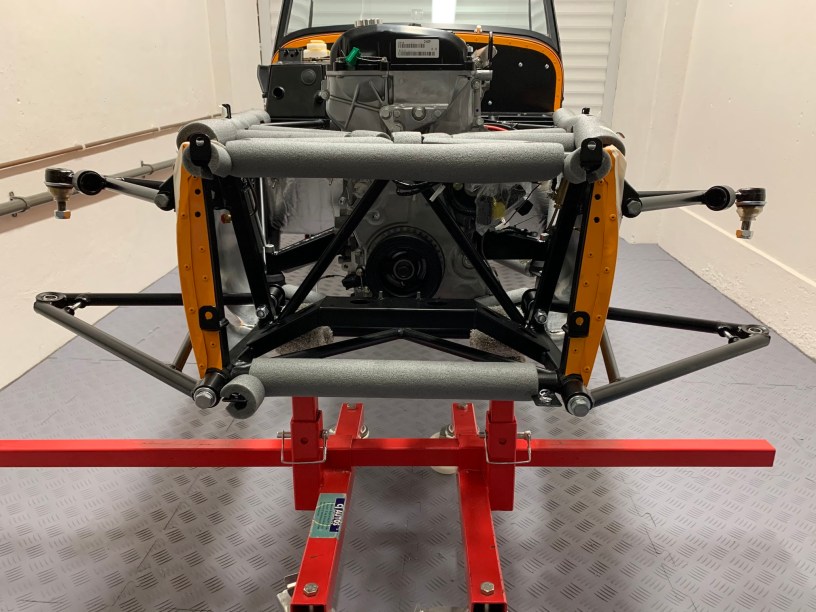
Now everything fits it is time to install the upper wishbones. Insert the spacer into the rear mounting bush (with copper grease of course). These wishbones fit with little tolerance, so a smear of copper grease on the face of the bush will help you get it located.

To align the bolt holes my usual go-to tool is my selection of pin punches, unfortunately they are too long, so I had to find another solution. Fortunately a small 1/4” drive extension was the perfect size. The rear mounting bolt took a fair bit of effort to get it aligned, so I started with that. The front bolt was simply aligned by hand.

The rear bolt was tightened, but not torqued to the 47Nm yet. I am waiting for the suspension to be completely assembled before I do this, so that the bush is in its correct location when the bolt is torqued. The front bolt is left finger tight until the headlamp bracket is installed.
You will notice I used a bungee-cord today in my tools used, this was just to prevent the wishbone from touching the side-skin while loose.
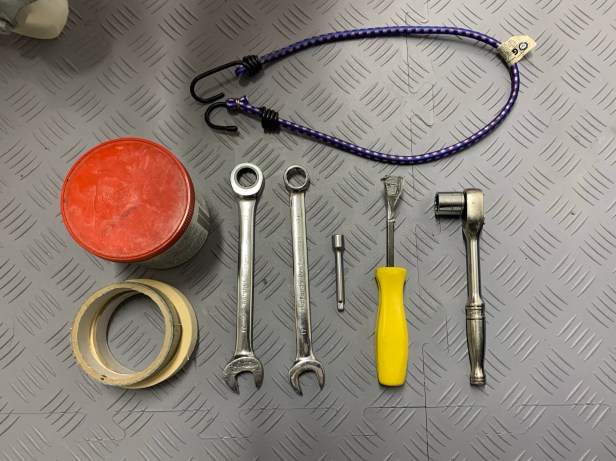
Tools Used
- 17mm 3/8″ Socket
- 3/8″ Ratchet
- Small Pry Bar
- Short 1/4″ extension
- 17mm Combination Spanner
- 17mm Combination Ratchet Ring Spanner
- Bungee
- Tape for paint protection
UPDATE – Check the welding around the Anti Roll Bar (ARB) mounting cup on the wishbone. Make sure there is sufficient space for the ARB rubber boot to fit. You can see my RHS upper wishbone did not have the clearance needed and Caterham agreed to exchange it.
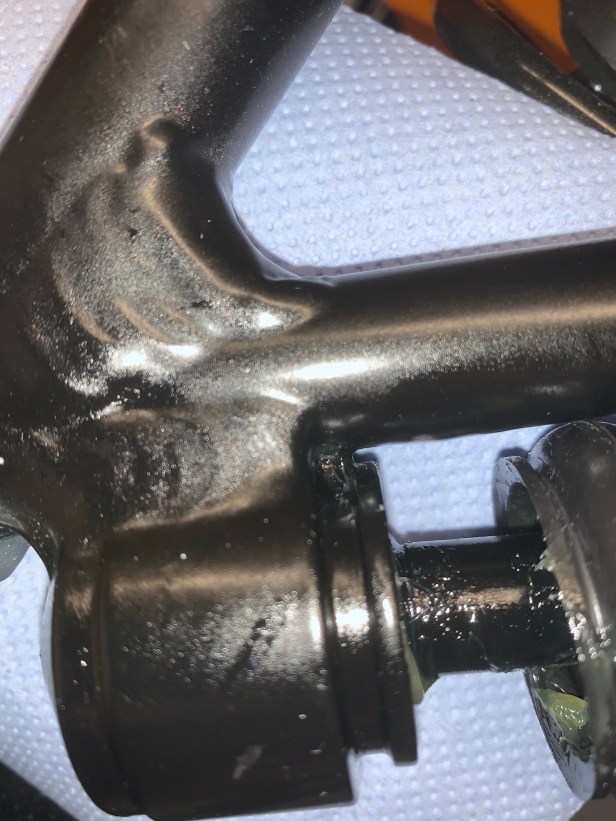
Weld prevents ARB rubber boot from fitting 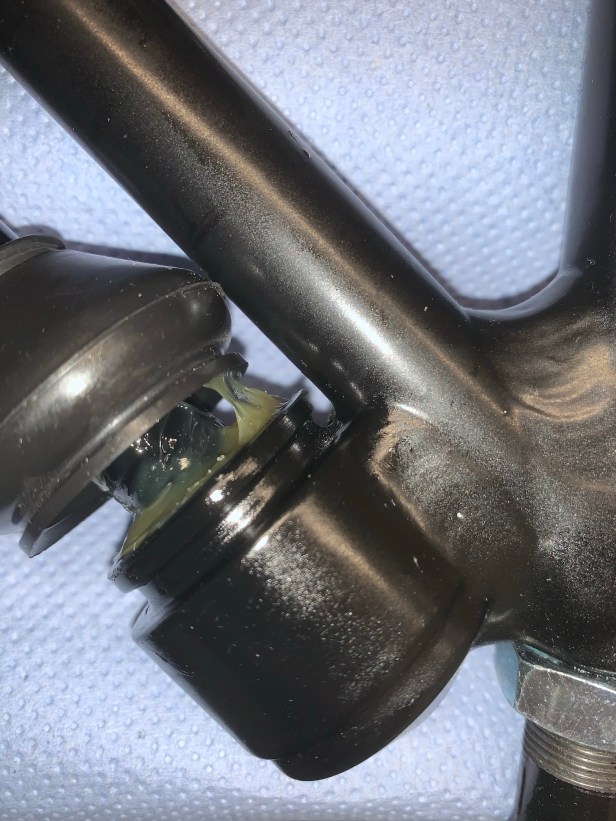
Rubber boot recess clear from weld

The front and rear suspension pack includes 8 rather similar looking but unmarked sleeves, The 30mm long thick walled sleeves are M8 and slightly longer thinner walled sleeves are M10. The Duratec Assembly Guide numbers them 2 and 3 but doesn’t say which is which. The M8 are number 2 in the Guide and the M10 are number 3.
LikeLike