
Now I have torqued the rear wheel hub nuts, I feel it’s time to get the rear wings installed, mainly because they take up a lot of space in my spare room. I had already part-fitted them when I trimmed them before they where sent for PPF covering, so I know they fit.
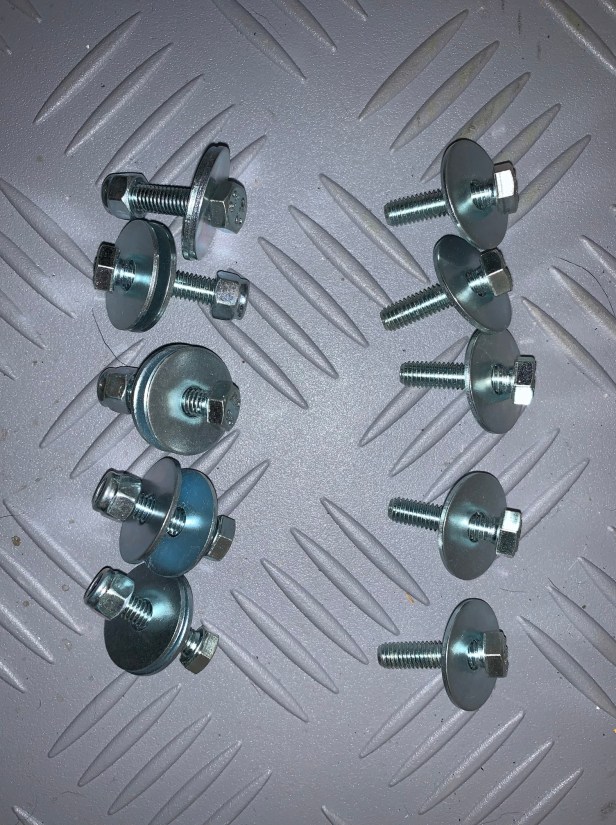
Rear wing fixings 
Nylon bolts for post IVA
The fixings for the rear wings can be split into two. The front five bolts fit into rivnuts with a single washer inserted into the side skin, the rear five have a second washer and a nyloc nut. I personally recommend replacing them post-IVA with nylon bolts, as used by Caterham race cars, mainly to protect the side skin in a minor accident. As it stands, the kit supplied bolts are far stronger than the side skins, so under a sudden impact they will rip the rivnuts out and tear the side skin. By using nylon bolts, you can turn the balance of strength between side skin and rear wing fittings around, because the nylon bolts are weaker than the side skin and sacrificial parts during a minor accident. They will break under the impact and the wing can come off the car without tearing the side skin.

Get the first bolt started 
Fit the piping
I started by resting the rear wing on the radius arm and get one of the front fixings. Once I have one fixing in place, the piping that I have already trimmed, can be positioned.

Front five bolts 
Rear five bolts 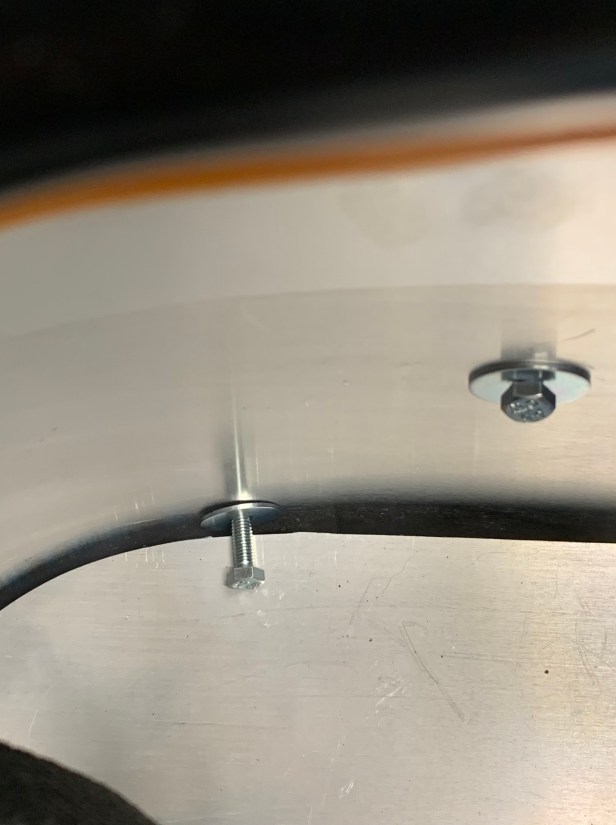
Rear five bolt go from the inside to the outside
It was then just a case of getting the rest of the fittings fitted. The rear five bolts pass through from the inside (boot) and the nut is fitted outside under the rear wing. There is no need to go to mad with the torque.

Rear wing needed a little more trimming 
Copper slip on the front five bolts
I did have one minor issue, and I think this is only because my rear wings are carbon fibre, because I have never had this problem before. The rear most bottom lip touched the side skin, so a little more trimming was required.
Finally I removed each of the front five bolts and I applied copper slip, because the side skin rivnuts are well known to rust over time and then spin when an attempt to remove them is made. Therefore I am doing everything I can to prevent this problem now.

Tools Used
- 8mm ring spanner
- 8mm 1/4″ drive socket
- 8mm open ended spanner
- 1/4″ drive ratchet

If you are fitting the carbon wing protectors there seem to be two schools of thought. The manual implies and some blogs suggest drilling and fixing the rivets that run down the inside adjacent to the body first. I started on that method but because the wing and protector have curves in two directions I found the fit drifting and becoming less than perfect and in the I end drilled out the rivets I’d fixed and started again.
Working progressively from the top of the wing I drilled holes for both inside and outside edges of the protector. After drilling each hole I fitted a rivet but didn’t fix it. I worked down until I had all rivets in position, but none fixed (similar in some ways to the tunnel top). The advantage of this method is that if it starts to go wrong you can remove a rivet and make any necessary adjustments relatively easily. In practice no adjustments were necessary and the protector was a good fit on the wing.
LikeLiked by 1 person
[420R S3, Q1 2022]. Completely agree with the approach in your second paragraph, Nick – work progressively round holding the protector in place with fitted, but not fixed, rivets. I just used strips of masking tape on the wing to mark the holes through the protector with a pencil.
LikeLike