
A bit of planning is needed before you begin with the engine plumbing: you need to use the right angle and 180 degree silicone hose bends provided in the kit effectively. My last kit build, a 360R with a heater, was a lot more complicated when it came to the plumbing. A heater-less 420R by comparison is much simpler.
The lowest hose on the engine is the bottom hose, so that’s where I started. It’s a simple push on to the thermostat on the engine (on the left hand side). I made sure the hose didn’t touch the brake lines, but this does mean it touches the body of the steering rack. When the radiator is fitted later, I will secure the hose to the rack with tie wraps to prevent chafing.

Rubber lubricant makes fitting easier 
Access it tight 
Bottom hose in position 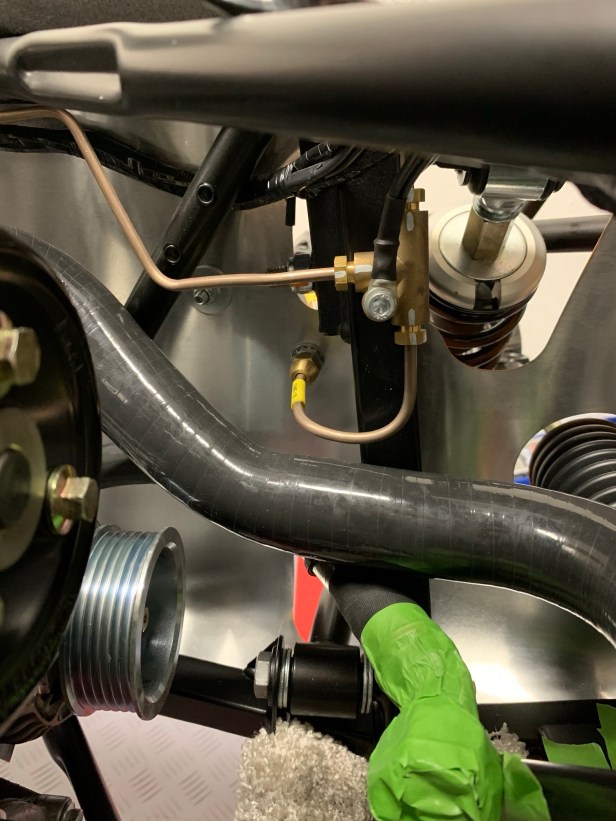
Avoid the brake lines
The kit supplies two 180 degree silicone hoses and one right angle hose for cooling. Another right angle hose is supplied for the engine breather.
The 180 degree bends are for the block to submarine hose and the expansion tank to T-piece hose. The right angle bend hose I decided to use from the submarine to the T-piece.
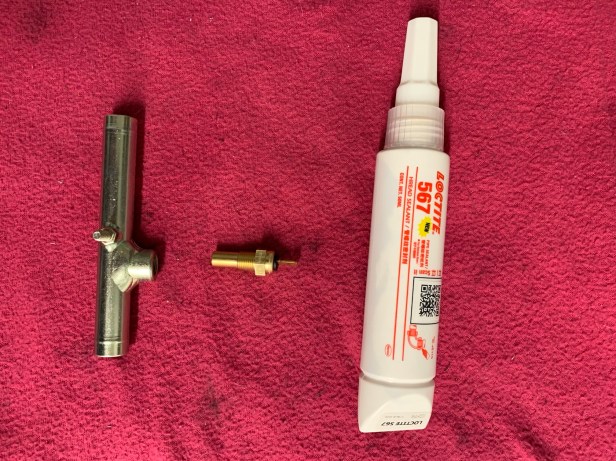
Submarine and loctite 
Submarine assembled 
Loctite to seal the sensor
I started with building up the submarine, so called because the shape resembles a submarine. Fitting the temperature gauge sensor with a bit of liquid thread sealer (I used Loctite 567) and the earth tag to the submarine is simple. I checked the connectivity between the earth tag and the body of the temperature gauge sensor before continuing. If you have a multi-meter, I recommend you do the same.
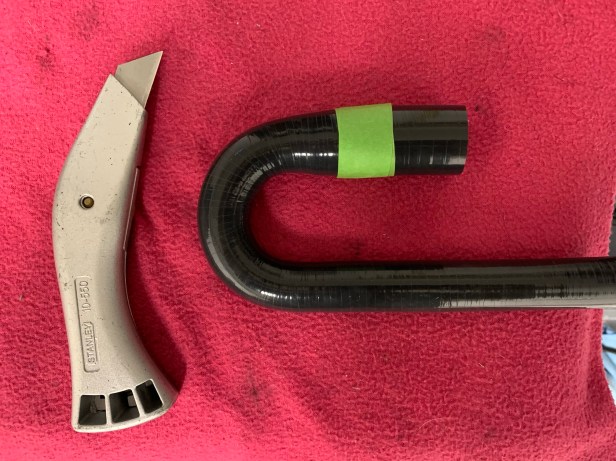
The 180 degree hose has an enlarged opening, so I had to cut the hose to make it fit the 19mm connection on the back of the block. When cutting the silicone hoses, I use a knife and some masking tape to help me get as straight a cut as I can manage.
Measure the hose length 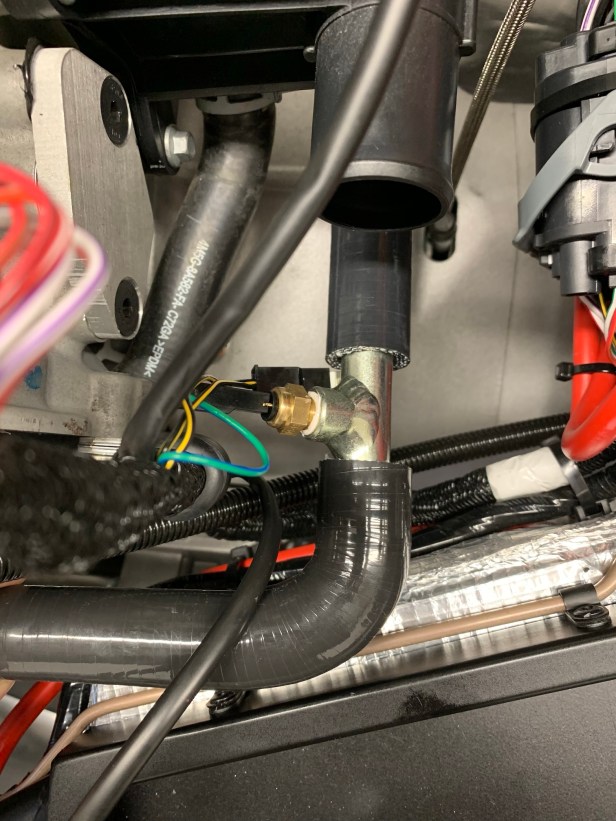
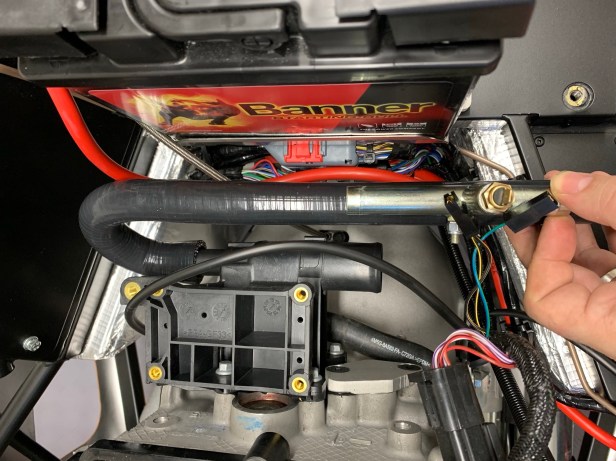
Temperature gauge wires not stretched
The connections on the submarine have to line up with the wiring for the temperature gauge in the engine wiring loom. So I measured the next hose cut with the submarine in the desired location. The factory currently routes this hose under the black water connection on the block, therefore I followed their lead on this.
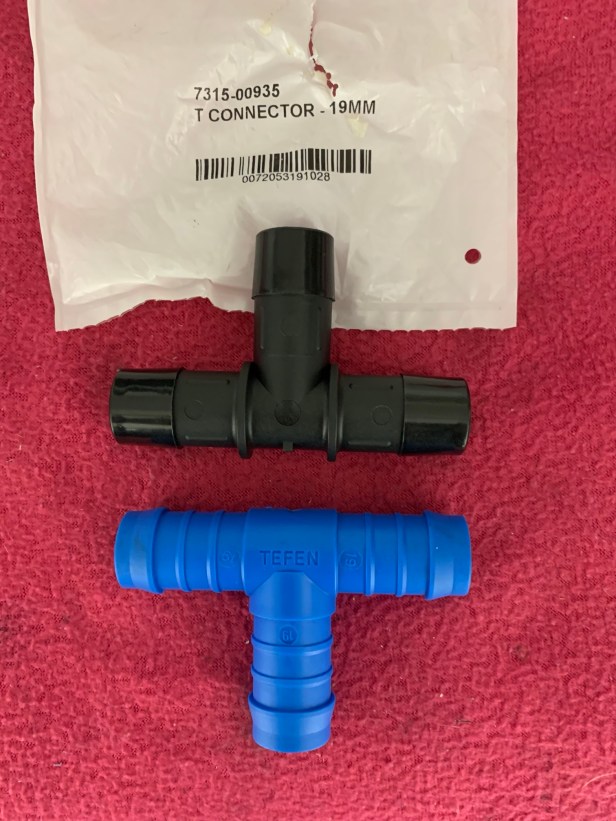
My 360R kit’s T-Piece malformed due to temperature within the first few weeks, thankfully Caterham now supply a stronger alternative. Using the manufacturer name, I was able to discover the maximum operating temperature for the supplied T Piece, which is 110°C. To me, this seems a little marginal, so I am changing it for a Gates 19mm T Piece, which is rated to 250C, which seems much more suitable. I sourced it from eBay using the Gates product number (7315-00935) part number (28635).

T piece location 
T piece with hoses fitted
I cut and fit the rest of the hoses using the same technique: measure, masking tape, knife. Fitting is easier with plenty of rubber lubricant on either of the joints or on the inside of the hoses.
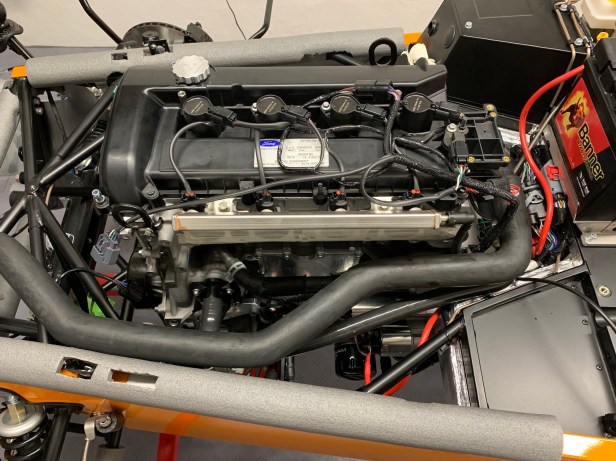
Next I fitted the top hose.
At the moment, I am not fitting hose clips, because I am not going to use the kit supplied clips. I am going to use Makalor Supra hose clamps, which means I have to measure each connection before ordering them. Makalor Supra hose clamps can be fitted with the hoses in place, so that will have to wait for a later post.
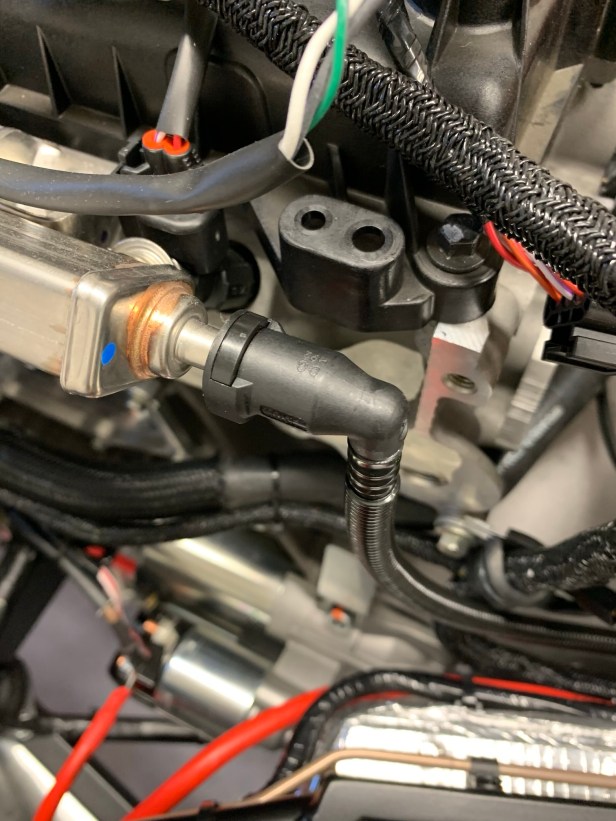
Finally I connected the fuel supply to the fuel rail. The old manual (2015c) talks about a being careful with the routing because a special tool is required to remove it the once connected. While is important that nothing interferes with this hose the information about a special tool is incorrect, you just need to press the clip with your finger to release the fuel hose if needed.

Tools Used
- 8mm 1/4 drive socket
- 1/4 drive ratchet
- small ruler
- chalk (to mark cut)
- 1/2” combination spanner
- knife

[420R S3, Q1 2022]. My build includes the heater, but surprisingly none of the supplied hoses were long enough to connect the T-piece to the heater as required. Due to time constraints I ‘solved’ the issue with a very short off-cut and the supplied straight connector. Not very satisfying and something that will be resolved next time I have reason to drain the coolant.
Top tip: I highly recommend spending time thinking about the orientation and accessibility of all the p-clips now while you can easily change it. You will have to tighten them all in due course as the pipes soften with use – if you make access easy now you will make your life easier in the future. (And get to enjoy a slightly smug feeling every time).
LikeLiked by 1 person