Before you follow these steps make sure you have access to all the tools. I have owned an Econoseal connector crimping tool for a number of years, because Econoseal connectors are main type of electrical connector used by Caterham.

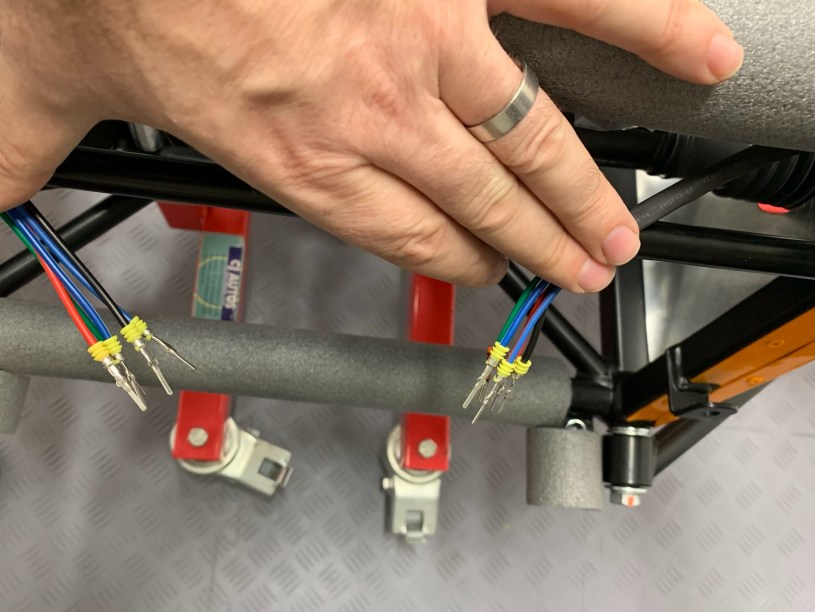
When I have done the wiring for the headlights before, I have always cut the factory supplied connectors off first, because that makes it easier getting the wires through the holes and grommets, knowing I can replace them at the end. Therefore for the purposes of this blog and photos I didn’t cut them. Not everyone will have access to the crimping tool, or be prepared to purchase one.
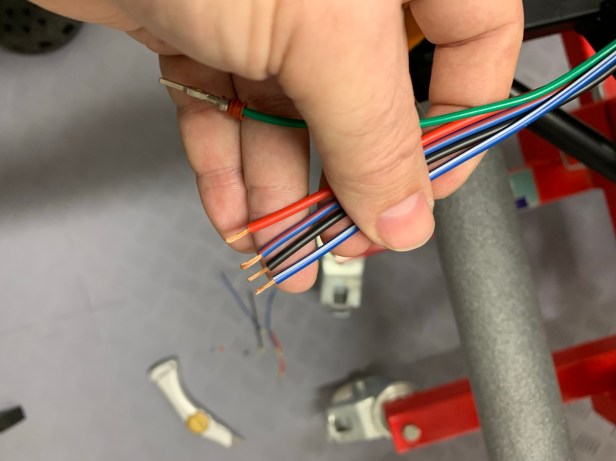
So, if you want to neaten your headlight connector wiring these are my tips: Start with cutting the wires to the length you want. I chose to cut them all to the same length as the shortest wire (which was the indicator wire). I have seen blogs where the indicator wire is routed up into the headlight and then back into the headlight mount. If that’s your chosen route, then this problem of the indicator wire being shorter than the headlight wiring only gets worse.

Strip the wires you need to 2 – 3mm of bare wire.
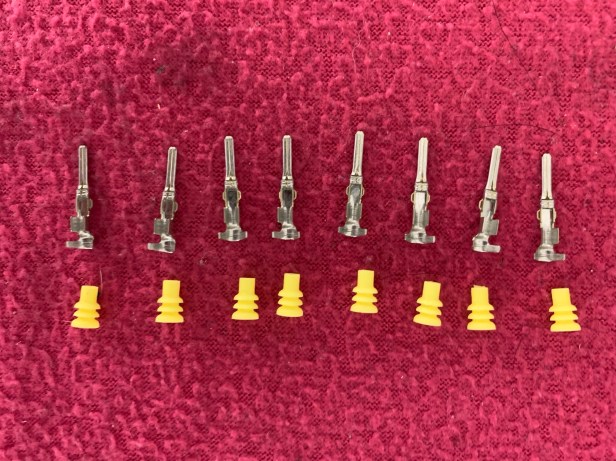
Fit the new Econoseal wire seals (yellow as per the supplied wiring)

Crimp the new Econoseal pins onto the wires. If this is the first time you’re crimping Econoseal pins, then I would suggest you have a few practice attempts before you attempt it on your Caterham’s headlight wiring. It took me a few attempts to get the knack, and the few people I have lent the tool to have also reported the same experience.

Now I have wires that are ready to install into the Econoseal connector block. I will do this when I have finished all the plumping in the area.

Tools Used
- Side cutters
- Knife
- Econoseal crimping tool
If you want a source of Econoseal connectors and the crimping tool, I use https://www.polevolt.co.uk
UPDATE – The Econoseal connections assembled added during the radiator install. https://caterham420detailedbuildblog.co.uk/2019/12/30/radiator/
