
When I built my 360R, I didn’t have time to prep the garage because I purchased the kit as an unfinished project. It was a little less than a month between agreeing the deal and having the kit delivered.
My garage is an early 70s built single, with bare concrete render walls, a bare artex ceiling with a single lightbulb dangling from it, and a concrete floor, which may have seen paint when the house was built. Basically, it was a small, dark, dusty and draughty space to build a car in. However, the biggest pain was the electrics: only one single socket and a single pendant 100w light bulb. On a positive note, the build took place during the summer, so these issues were mitigated slightly.


So, building in a single garage brings a space challenge. I was aware of this problem when working on my other Caterham: when you remove parts from a car, you run out of space real quick. Thankfully I have an understanding wife who allows me to store clean parts in the house in the spare room.
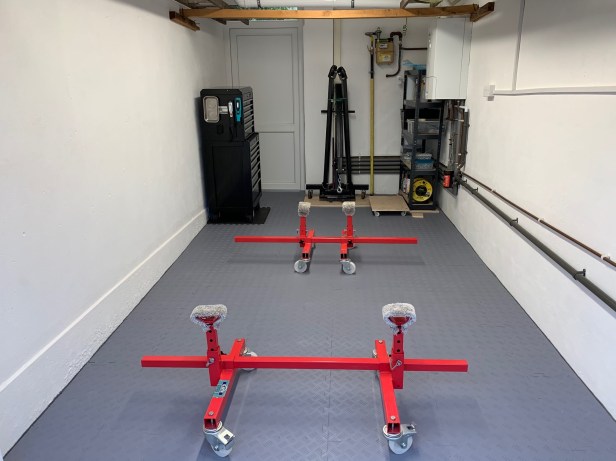
Without doubt, the best purchase I made during the 360R build were wheeled axle stands (https://www.cjautos.eu/MOBILE_AXLE_STANDS_p/cm05c.htm). I did not shorten the cross bars but left them at full width. This allowed me to push the chassis close to the wall without the risk of damage. Picking larger nylon wheels was essential, because my concrete floor was very rough.
This time round I have had a at least 5 months between ordering the kit and delivery, so I had time to make some garage improvements.
A new garage door and a new external door replaced the wonky and disintegrating doors to eliminate the constant draught and to provide better security. To control the dust, I treated the walls and ceiling to a few coats of emulsion, nothing special. I then decided to paint the floor with an epoxy floor paint from Floor Saver (https://www.floorsaver.co.uk). This proved to be a little more complicated than needed, because I couldn’t find a safe place to store my tool box, so I painted the floor in two halves moving the tool box between each coat. The epoxy floor paint is only workable for two hours, dry to walk on at sixteen hours and any additional coats need to be applied within five days, so a bit of planning was required.
This paint looks tough, but I think it will chip if I start dragging the engine hoist or my tool box over it, especially as the concrete floor is not smooth. I therefore decided to cover the floor with interlocking tiles. I picked Duramat floor tiles (https://duramat.co.uk); they are of solid and heavy duty quality, have a non-slip texture and look good, but time will tell how they stand up to the abuse of building a Caterham on them.
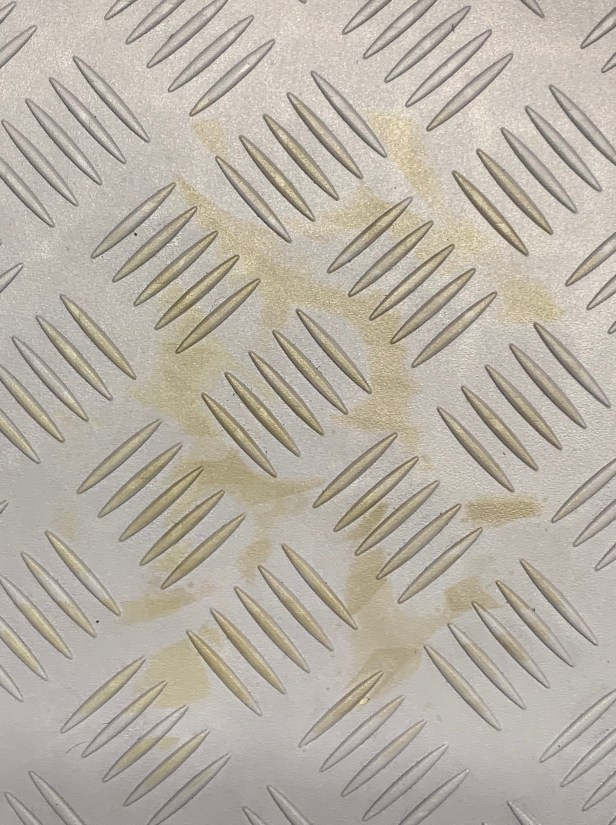
UPDATE – These tiles have stood up well to the Caterham build, but there has been one problem now my Caterham in on the road: The 420R standard fit Avon ZZS tyres leave a brown stain on the tile if left in the same spot for two weeks or more. It’s my understanding that this is caused by antioxidant additives in tyre reacting with the vinyl tile. These brown statins resist all cleaners, so I have resorted to replacing the tiles under the tyres with black tiles.
All this should have been simple within the 5 month timeframe, but actually time quickly ran away when I had to factor in lead times for a garden shed (for storage) and its base to be built, the garage and external doors’ lead times and fitting as well as our family holiday. This compressed the painting and floor-laying time to just 3 weeks.
Two new LED strip lightings over the build space (http://www.belllighting.co.uk/fittings/DuraLEDIP65Batten) from (Universal Lighting ) and new sockets finally completed my garage prep.
Well – that was until I came back from holiday to find my boiler pouring water all over my nice new floor and walls. Thankfully, my sloped garage floor had allowed the water to run out under the tiles and sit on top of the epoxy paint, no actual damage was done.

How are you finding your wheeled axle stands?
LikeLike
They make building a Caterham so much easier, especially in a UK single garage built in the 1970’s, where space is at a premium. Without them I would not be able to move the chassis during the build. For example when I used the engine hoist to install the differential, the chassis was moved so I could relocate the engine hoist within the garage.
I have the slightly larger wheeled version which has two massive advantages. One my engine hoist fits under the stands so I don’t have to remove the chassis from the stands while using the engine hoist, and two they move over rough surfaces easier. There is one disadvantage for 420 builders, one of the dry sump hoses fouls the stand, so I have to wait to install that hose. It’s not a problem for any other model.
All that said it will soon be time to remove the chassis from these stands, when I have a working handbrake.
LikeLike
Thanks for your reply. So would you say that for a completed 420R that these would be of no use due to fouling? I’m thinking of them for my 420R as a way to keep the car up on stands, but with the ability to move it laterally in my garage (double garage).
LikeLike
They could be made to fit if you reduced the cup on the front left hand side. It would take about 5 mins with an angle grinder. Alternatively the small wheeled version has smaller cups. The only down side to the small wheel version is you can’t pass an engine hoist under them and they are not so good on ruff surfaces, but it sounds like this isn’t a issue.
LikeLike
Hi Chris…do you happen to have dimensions on your garage? I’m going to be in a similar situation… 😉 J.
LikeLiked by 1 person
Hi J, my garage is 2.5m x 5.5m. If does narrow to 2.2m near the garage door. It’s a typical 70s uk single garage, so not suitable for all but the smallest modern cars. Hope this helps Chris.
LikeLike