
Having experienced an A-frame failure, thankfully at low speed, it’s important to take care during the A-frame fitting.
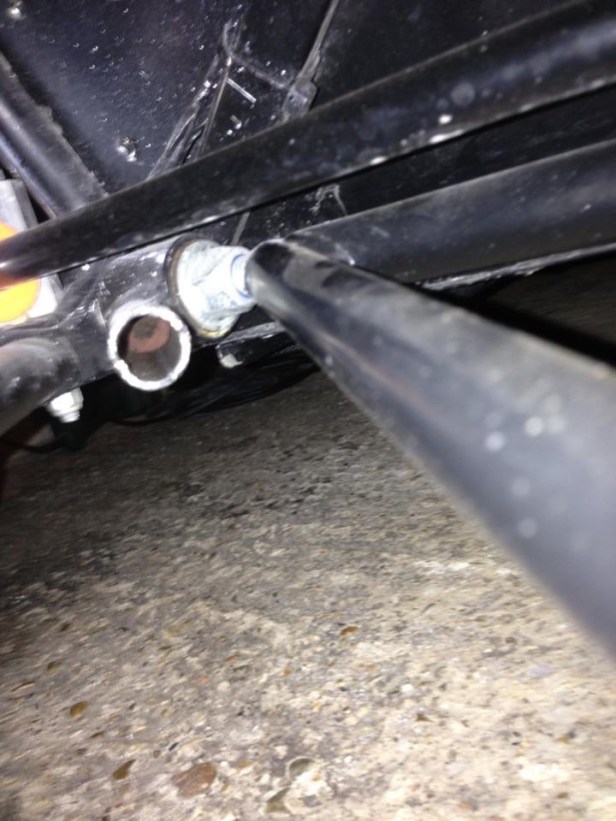
It’s a bit difficult to see from the only image I have, but there were insufficient washers installed and the A-frame snapped, because it was being pulled apart by the bolts. I suppose it could have been just one of those things when you own an ex-race car.
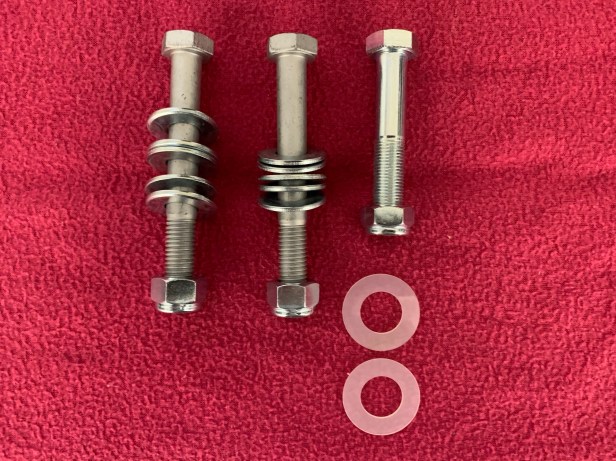
A-frame fixings 
Careful of the wires 
A-frame held by bolt
The A-frame fixings are a mixture of metric and imperial bolts. The bolts attaching the A-frame the chassis are metric and the bolt that attaches the A-frame to the De Dion is imperial.
Be careful when installing the A-frame (and the rear anti-roll bar) with the wiring in this area, you don’t want to squeeze or pinch them during the install.
I start by holding the A-frame on the chassis by just passing the metric bolt through the chassis and A-frame.
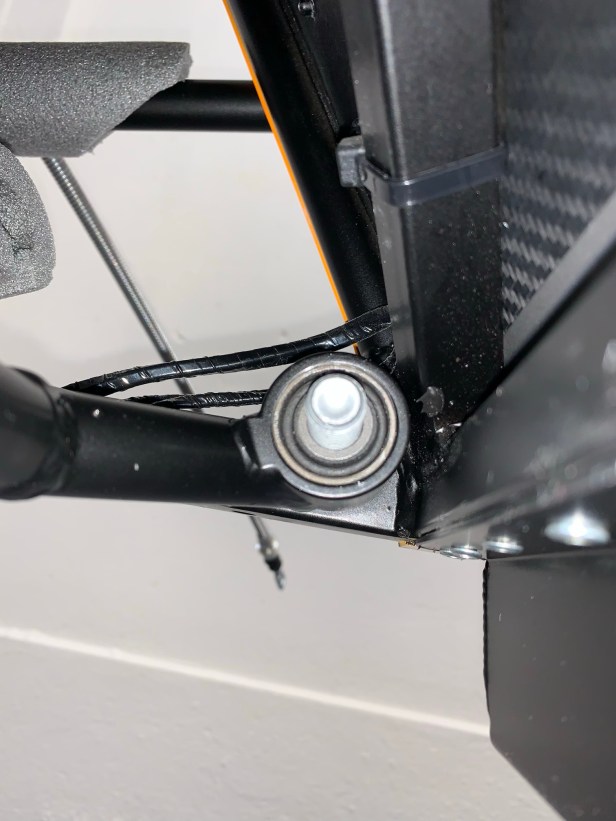
It’s really important to get the A-frame the right way up. The pivot points should be above the frame. At this stage I don’t fit any washers or nuts to these metric bolts; they are just there to hold the A-frame in place.
Ready to fit De Dion bolt 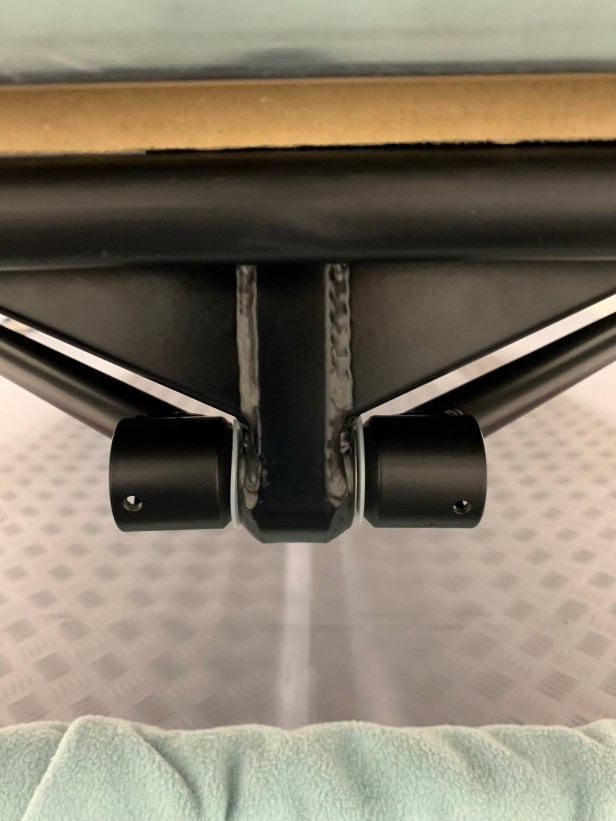
De Dion A-frame bolt fitted
Now I fitted the imperial bolt into the A-frame / De Dion tube. As usual, I applied a little copper grease. This bolt can take a bit of alignment, but I didn’t need the pin punches. Don’t forget the nylon washers. Once the bolt was started I did have to wind the bolt through the hole, until there was enough thread clear to get the nut installed. For this job you will need a thin-walled 3/4” deep socket to get to the nyloc nut. If the socket-wall is too thick it gets caught on the A-frame.

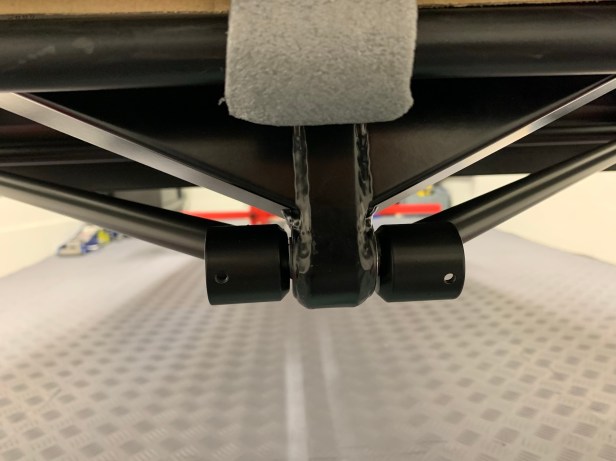
Getting the starting point The gap for the spacer washers
The new manual (v1.2 and v2.0) only states fit washers where required. The old manual (2015c) advises ”normal” is three washers are fitted one side, and four on the other, which is the same as my 360R. I measured the gaps and found I could fit six washers easily and seven with a push, so that’s what I went with.
As usual, one side was a little more tricky to get aligned than the other, so that’s the side I started with. Aligning these washers needed my selection of pin punches, and even a tap (and I mean a tap) with the dead-blow hammer on the bolt for that final push.

Three washers on the right-hand-side 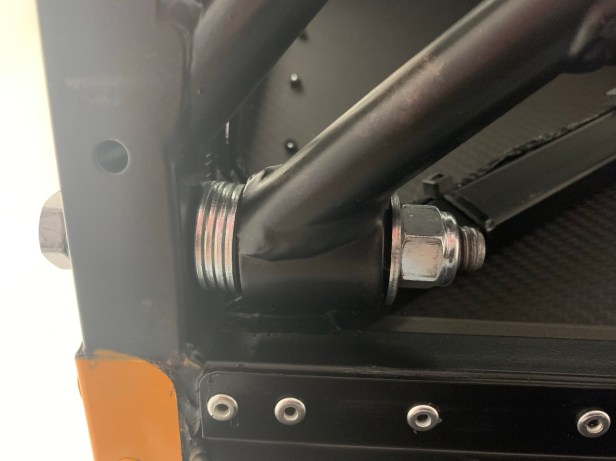
Four washers on the left-hand-side 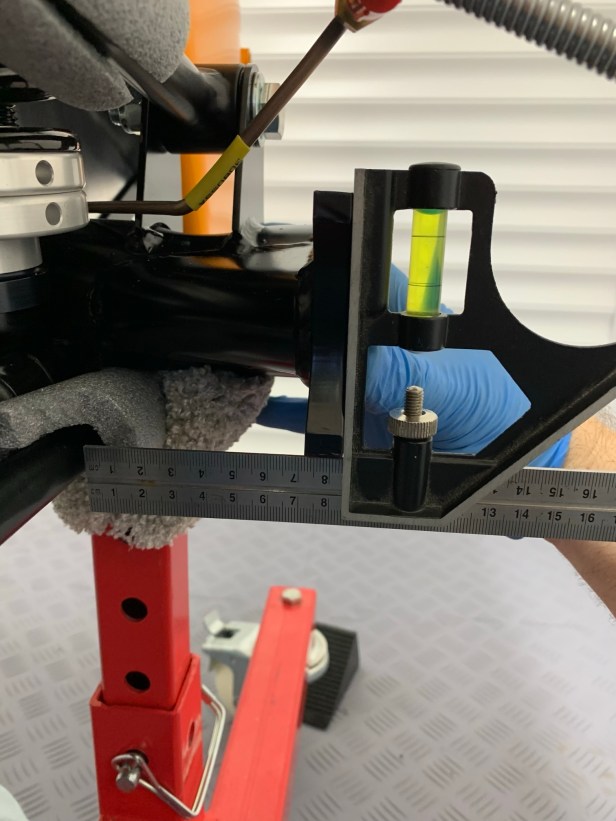
Now the De Dion tube is spot on
With four washers on the left-hand-side and three on the right, the set square showed exactly the same measurements each side. You should be able to get it within 1mm difference between the chassis tube and the De Dion tube ear mount.
With the A-frame installed I could now raise the car on the De Dion tube, so the rear suspension could take the weight of the chassis. As this stage I was able to torque all the rear suspension components installed so far.

Tools used
- Dead-blow hammer
- 19mm Semi Deep 3/8” drive socket
- 19mm 3/8” drive socket
- 3/4” Deep 3/8” drive socket (thin walled)
- 3/4” 3/8” drive socket (thin walled)
- 3/8” drive ratchet x 2
- 3/8” drive extension
- Selection of pin punches
- Set square

If following the IKEA style manual step by step, then beware. Pages 122 and 123 deal with the radius arms. The Tip on these pages says “Before torquing these bolts reposition the axle stands to under the DeDion tube”. What is should also say is “BUT don’t do this now!” If you follow the “Tip” the DeDion will rotate making it impossible to fit the A frame. Only reposition the axle stands after the A frame is fitted, but before it is torqued.
Tip.
The chamfered side of the suspension spacer washers is very obvious when laid out on the work bench. However, when trying to squeeze in the last one to even up the suspension it is easy to lose track of which side is which. My advice is simple. Put a small dab of the paint you are using to mark tightened fasteners on the chamfered surface. It is then very easy to see whether the washer surface against the bush is the correct, chamfered, side.
LikeLike
As at January 2022 the nylon washers for the A frame to Dedion connection are no longer supplied with the kit as Caterham deem them not necessary. The manual still refers to the washers being fitted.
LikeLiked by 1 person
In some respects that’s a blessing, they don’t last very long, needing annual replacement. But I would still consider them especially given their cost, and if ZZR tyres and trackdays are your thing.
LikeLike
Update March 2026. The nylon antisqueak washers are now supplied and should be found in the unmarked pack along with the hub nuts.
LikeLike